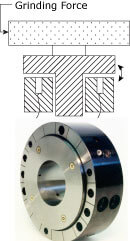
Embedded capacitive sensors measure grinding force
A manufacturer of high-performance spindles needed to measure grinding force to prevent damage to ceramic material.
Custom capacitive sensor probes were designed which were embedded in four locations in an air-bearing spindle stator during assembly. The stator surface, with the installed probes, was then ground to the flatness specifications for the spindle. Output from the sensors was used to measure changes in the air gap between the stator and rotor. These displacements were calibrated to known forces on the spindle. The capacitive sensor outputs were used in production as a feedback mechanism to set feed rates and prevent over stressing the ceramic material during grinding.
