 Precision Sensors and Targets
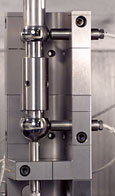
Noncontact capacitive probes mounted in a nest measure the dynamic displacement of precision master ball targets mounted in the spindle’s tool holder or lathe chuck.
Five Axes of Measurement
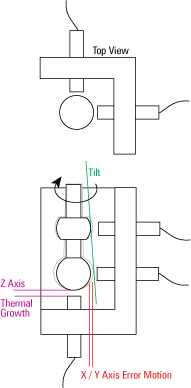
A probe is mounted from the bottom to measure movement in the Z axis. A pair of probes are mounted at right angles (top view) to measure movement in the X and Y axes. A second pair of X and Y probes are mounted to measure a second master ball. The combination of these probe pairs generates tilt measurements.
 Analysis and Display
Proprietary software collects readings from the probes while the spindle is turning, analyzes the results, and reports them on screen with polar and linear plots and discreet measurement values.
Tests Include:
- Rotating Sensitive Radial
- Fixed Sensitive Radial
- Radial Tilt
- Axial
- Thermal Growth
- FFT
Listed values include:
- Synchronous error
- Asynchronous error
- X and Y Axis TIRs
- Thermal Growth
- Tilt
- More…
