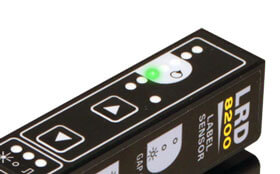
Ultrasonic label sensors usually only have Shift adjustments. The sensor is adjusted by shifting the measurement to center the Trip Point between the label and gap measurements. Your sensor may have some type of automatic setting.
Automatic Setting
On most ultrasonic sensors, a combination of buttons or press-and-hold technique activates an automatic adjustment. The LRD8200 Gap Quickset is activated by pressing both the up and down adjustment buttons at the same time when a gap is centered in the sensor. The light bar will sequence the lights until they reach the Gap Setup light at the bottom of the gray highlighted area.
The Gap Setup light should be on when the gap between labels is centered in the sensor.
- Center a gap in the sensor, or remove a label and place the liner only in the sensor.
- Press both the Up and Down adjustment buttons at the same time.
- The light bar will sequence the lights until they reach the Gap Setup light at the bottom of the gray highlighted area
- Move a few labels through the sensor and verify that the Gap Setup light is on during the gap between labels. If it isn’t then adjust the sensor manually until it is.

The Gap Setup light should be on when the gap between labels is centered in the sensor.
Manual Adjustments
The LRD8200 has a fixed gain setting. The only adjustment to be made is the Offset.
- Center a gap in the sensor, or remove a label and place the liner only in the sensor.
- Use the Up and Down adjustment keys to move the light bar to the Gap Setup light which is at the bottom of the gray highlighted area.
- Move a few labels through the sensor and verify that the Gap Setup light is on during the gap between labels. If it isn’t then adjust the sensor until it is.
